Rina Sato
Valorant Abyss Guide | Callouts, Strategies & Best Agents (2026)
Learn how to play Abyss in Valorant with practical callouts, attack and defense strategies, site setups, agent recommendations, utility tips and ranked advice for 2026.
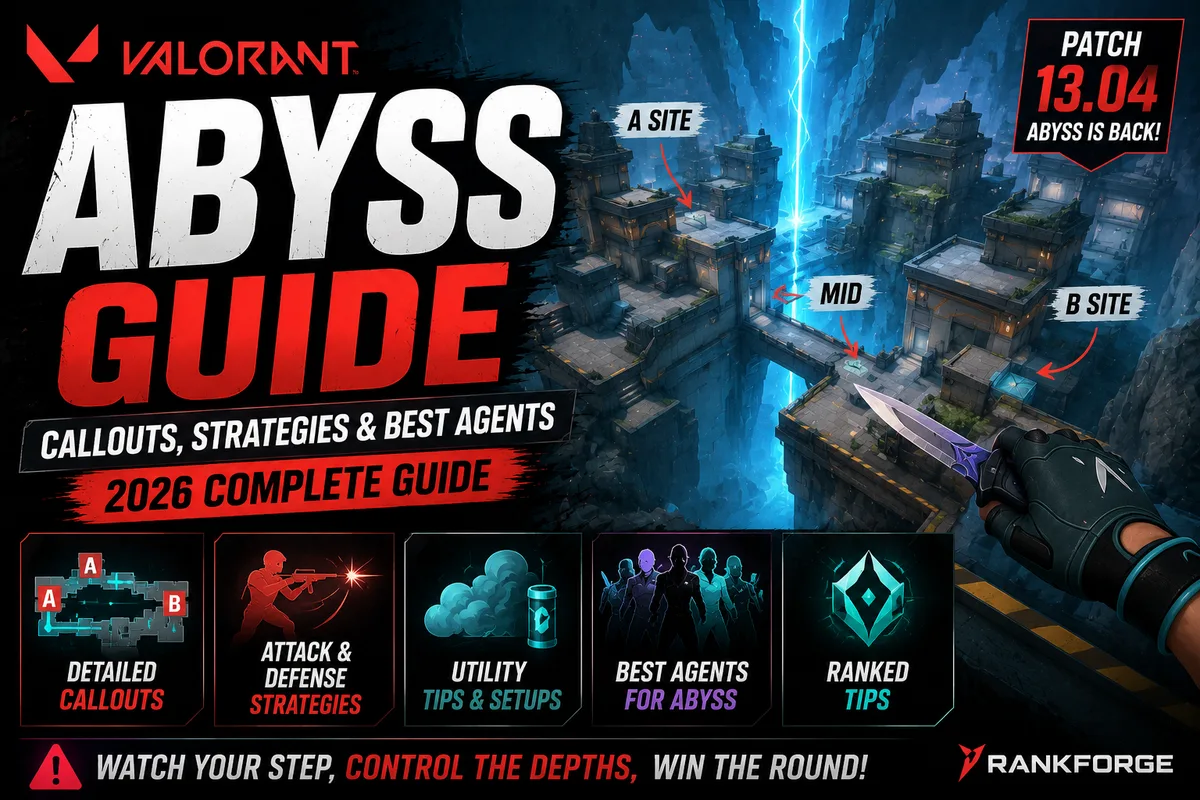
Valorant Abyss Guide | Callouts, Strategies & Best Agents (2026)
Abyss is back in the Valorant Competitive map pool.
With Patch 13.04, Riot returned Abyss to both Competitive and Deathmatch while removing Breeze from those queues. That makes Abyss an important map to understand again if you're actively playing Ranked.
Abyss is very different from traditional Valorant maps.
Its layout creates unusual vertical risks, long sightlines, multiple ways to rotate and several situations where poor positioning can result in an instant death.
That means simply knowing the basic site layouts isn't enough.
You need to understand:
- Abyss callouts
- Attack routes
- Defensive setups
- Mid control
- A Site strategies
- B Site strategies
- Retakes
- Utility usage
- Agent selection
- How to avoid falling from the map
- How to convert map control into round wins
This guide explains how to play Abyss effectively in Ranked.
What Makes Abyss Different?
Abyss has one major characteristic that immediately separates it from most Valorant maps:
There are areas where falling off the map can kill you.
That changes how players approach certain fights.
A normal wide swing can become much more dangerous when there is no safe floor behind you.
The map also has several long sightlines and unusual paths that reward players who understand positioning.
This makes Abyss a map where:
Positioning + utility + information can be just as important as raw aim.
Is Abyss Back in Competitive?
Yes.
Riot's Patch 13.04 map update returned Abyss to the Competitive and Deathmatch queues and removed Breeze from those queues.
The change came with the start of Act 5.
So if you've been away from Valorant for a while, Abyss is a map you should add back into your Ranked preparation.
Abyss Map Structure
The easiest way to understand Abyss is to divide the map into several major areas:
- A Site
- B Site
- Mid
- A Main
- B Main
- Defender areas
- Connector routes
- Long-range sightlines
- Drop/fall areas
You don't need to memorize every small corner immediately.
Start with the major routes.
Once those become familiar, learn the smaller positions that repeatedly appear in Ranked games.
Abyss Callouts
Good communication starts with simple callouts.
You don't need complicated terminology.
Your team should be able to communicate:
- Where the enemy is
- Which site is under pressure
- Where utility is placed
- Where the spike is
- Which player is rotating
- Which area is controlled
A Main
A Main is one of the primary attacker routes toward A Site.
Attackers can use A Main to establish early pressure and force defenders to reveal their positions.
Defenders should avoid giving attackers free control of the area.
B Main
B Main is the primary approach toward B Site.
Controlling B Main gives attackers an important route toward the site.
Defenders should use utility carefully instead of wasting everything immediately.
Mid
Mid is one of the most important areas of Abyss.
Mid control can create additional rotation opportunities and force defenders to respect multiple attack directions.
If your team controls Mid, the defenders may have to spread their attention.
A Site
A Site has several important angles and positions that can be attacked from different directions.
Don't treat A Site as one single choke point.
The better approach is to create multiple threats.
B Site
B Site is another area where coordinated utility can make a major difference.
Attackers should avoid entering one at a time.
Defenders should try to isolate attackers and delay the plant.
Why Mid Control Matters on Abyss
Mid control is valuable because it changes the number of options available to your team.
Without Mid:
Your attack may become predictable.
With Mid:
You can potentially threaten different routes.
This creates a basic tactical principle:
More map control = more believable threats.
The enemy has to decide where to allocate defensive utility.
That creates opportunities elsewhere.
Don't Fight Mid Just Because It's Mid
Mid control is useful.
But it isn't automatically worth five players fighting over it.
If your team has already gained useful information elsewhere, forcing a risky Mid fight can throw away your advantage.
The objective is not:
"Win Mid."
The objective is:
"Create a better round."
Abyss Attack Strategy
The most common mistake on Abyss is attacking too quickly.
Players often rush toward a site without first establishing enough information.
A better attack usually has three phases.
Phase 1: Establish Control
Take the space you need.
This can include:
- A Main
- B Main
- Mid
- Choke points
- Important angles
Don't unnecessarily expose yourself.
Phase 2: Force Defensive Utility
Once defenders know you're taking space, they will often respond.
This can force:
- Smokes
- Flashes
- Traps
- Slows
- Recon
- Defensive mollies
Once that utility is used, your next attack becomes easier.
Phase 3: Commit
Once your team has enough information and utility has been forced out, commit together.
The biggest rule is:
Don't enter one player at a time.
Trade each other.
A Site Attack
A Site attacks work best when you create more than one threat.
For example:
One player can pressure from the main route.
Another can hold a secondary angle.
A third player can prepare utility.
The objective is to prevent defenders from comfortably focusing on one choke.
A Site Entry
Before entering:
- Clear close angles
- Force defensive utility
- Smoke dangerous sightlines
- Prepare flashes or recon
- Make sure teammates are ready to trade
Then enter quickly.
Slow entries allow defenders to reset their positions.
A Site Post-Plant
After planting, don't automatically run away.
Your team should decide where the post-plant fight will happen.
Good post-plant positions should:
- Protect the spike
- Allow crossfires
- Maintain escape routes
- Make retakes uncomfortable
Don't give defenders isolated 1v1 fights.
B Site Attack
B Site attacks benefit heavily from preparation.
If defenders have full utility available, entering directly can be extremely difficult.
Use utility to remove their strongest defensive positions.
Then execute.
B Site Entry
The first player should create space.
The second player should be ready to trade.
The third player should support with utility.
This sounds simple, but many Ranked teams fail because everyone enters at different times.
B Site Post-Plant
Once the spike is planted, don't all stand directly next to it.
Spread your team.
You want multiple angles on the retake.
A defender should have to clear several threats instead of winning one duel and immediately reaching the spike.
Abyss Defense Strategy
Defending Abyss is mostly about controlling information and delaying attacks.
You don't need to fight for every inch of the map.
Instead:
- Establish early information
- Use utility efficiently
- Avoid unnecessary deaths
- Fall back when needed
- Retake with teammates
Don't Overextend
A common mistake is pushing too far simply because you haven't seen anyone.
No information does not mean:
"Nobody is there."
It can mean:
"They haven't revealed themselves yet."
This is especially important against coordinated teams.
A Site Defense
A Site defenders should prioritize:
- Early information
- Long-range control
- Entry denial
- Retake positioning
Don't waste every defensive ability during the first few seconds.
Keep enough utility to slow the actual execute.
Retaking A Site
If attackers gain control, don't immediately peek individually.
Wait for teammates.
Then:
1. Clear important angles.
2. Remove enemy utility.
3. Establish numbers.
4. Push together.
5. Clear the spike.
6. Secure the round.
A coordinated four-player retake is usually stronger than four separate 1v1 attempts.
B Site Defense
B Site defenders should think carefully about how much space they actually need to hold.
You don't always need to fight at the first possible position.
Sometimes giving attackers a small amount of space allows you to:
- Preserve utility
- Keep your life
- Get better information
- Prepare a retake
B Site Retake
The same rule applies:
Don't peek alone.
Coordinate your utility.
Force attackers away from strong positions.
Then retake together.
Abyss Utility Strategy
Utility is extremely valuable on Abyss because of the map's unusual geometry.
Smokes can remove dangerous sightlines.
Flashes can clear difficult angles.
Recon can reveal attackers before they reach the site.
Mollies can delay plants or post-plants.
Sentinel utility can watch areas while players reposition.
Don't Waste Utility at the Start
A common mistake is throwing every ability during the first 10 seconds.
Then the enemy executes.
And you have nothing left.
Instead, ask:
What am I trying to stop?
Use utility because it solves a problem.
Not simply because you have the ability available.
Best Agent Roles for Abyss
There isn't one mandatory team composition.
But Abyss benefits from agents that can provide:
- Long-range information
- Reliable smokes
- Site entry
- Flashes
- Defensive utility
- Rotation control
That means a balanced composition can be extremely effective.
Duelists
Duelists are responsible for creating space and taking fights.
Jett can be useful for aggressive entries and Operator play.
Raze can create explosive entry opportunities and clear difficult positions.
Neon can create rapid pressure when the team is coordinated.
Initiators
Initiators are extremely valuable for clearing dangerous angles.
Sova can provide information.
Fade can help reveal enemies and track movement.
Gekko can provide flexible utility and plant support.
Breach can create powerful entry opportunities when coordinated with a Duelist.
Controllers
Controllers are critical because Abyss contains several dangerous sightlines.
Omen can provide flexible smokes and repositioning.
Brimstone can provide reliable site execution utility.
Viper can create strong area control depending on the team composition.
Clove can provide flexible solo-queue value and continue contributing after death.
Sentinels
Sentinels are valuable for watching flanks and controlling areas.
Cypher can provide information and trap routes.
Killjoy can defend important areas with automated utility.
Sage can provide defensive utility and help reshape fights.
Best Agents for Solo Queue on Abyss
If you're playing without a coordinated five-stack, prioritize agents that can create value independently.
Good options include:
- Omen
- Clove
- Cypher
- Killjoy
- Sova
- Gekko
- Jett
The exact pick depends on the rest of your team.
Don't lock five agents that all require perfect coordination.
Playing Operator on Abyss
Abyss can create attractive Operator angles because of its long sightlines.
But the Operator is not automatically the best weapon for every round.
Use it when:
- You have a strong angle
- Your team can support you
- You can escape after the shot
- You have enough economy
- The enemy is likely to challenge the angle
Avoid holding the same angle every round.
Good opponents will adapt.
Vandal vs Phantom on Abyss
Both rifles remain strong.
Vandal
Useful for:
- Long-range fights
- Headshot-focused players
- Holding long sightlines
Phantom
Useful for:
- Closer fights
- Smoke engagements
- Higher-volume spraying
- Players who prefer controlled bursts
The best choice depends on your playstyle and the position you expect to fight from.
For more gunplay preparation, see our Valorant Aim Training Guide.
How to Play Abyss With an Operator
If you buy an Operator, your goal shouldn't simply be:
"Get kills."
Your goal is to create fear.
If the enemy knows an Operator is holding a long angle, they may:
- Use utility
- Rotate
- Avoid the angle
- Slow their execute
- Give up space
That is value even without a kill.
How to Avoid Falling Off Abyss
This sounds obvious.
But it happens.
Especially during:
- Panicked fights
- Movement abilities
- Retreats
- Close-range duels
- Fast rotations
Always know where the safe floor is.
Don't blindly strafe backward during a gunfight.
Don't use movement abilities without considering where they end.
And don't chase an enemy into a dangerous position simply because they're low HP.
A kill isn't worth throwing your life away.
Abyss Movement Mistakes
One of the biggest differences between Abyss and more traditional maps is that movement mistakes can be punished more severely.
Avoid:
- Blindly strafing backward
- Panic jumping
- Unnecessary movement abilities
- Chasing enemies around dangerous edges
- Fighting without an escape route
Good movement isn't only about speed.
It's about knowing where you're allowed to move.
Abyss and Crosshair Placement
Long sightlines make crosshair placement particularly important.
Don't aim at the center of the screen and react after seeing the enemy.
Pre-aim likely positions.
Keep your crosshair at head level.
Clear one angle at a time.
This reduces the amount of mechanical work required during the duel.
For a practical training routine, use our Valorant Aim Guide.
How to Clear Abyss Angles
Don't clear multiple dangerous angles simultaneously unless your utility allows it.
Instead:
Clear → reposition → clear → advance.
Use teammates to reduce the number of angles you personally need to watch.
This is one of the easiest ways to improve your survival rate.
Abyss Map Control
Map control doesn't mean standing everywhere.
It means controlling the areas that matter for your current plan.
If you're attacking A:
You may need A Main and enough Mid control to prevent easy rotations.
If you're attacking B:
B Main and supporting areas become more important.
If you're defending:
You may want information in multiple areas without exposing every player.
Think in terms of threats, not territory.
How to Fake on Abyss
A good fake requires believable pressure.
Simply walking into A for two seconds and then rotating rarely works against experienced players.
Instead:
- Show utility
- Make noise
- Take space
- Force defensive utility
- Then rotate
The goal is to make defenders believe the attack is real.
When Should You Rotate?
Don't rotate simply because you haven't seen an enemy.
Rotate when you have information.
Useful information includes:
- Multiple defenders spotted
- Important utility used
- Spike location
- Enemy rotation
- Site weakness
- Teammate control
The more information your team has, the more confident your rotation can be.
Abyss Eco Round Strategy
Eco rounds should still have a plan.
Don't run around randomly hoping to find a kill.
Consider:
- Stacking a site
- Playing for close-range fights
- Saving utility
- Using numbers
- Taking one coordinated gamble
A coordinated Sheriff round can be more dangerous than five players taking five separate fights.
Abyss Force Buy Strategy
Force buys are most effective when everyone understands the plan.
If three players buy while two players save, you may end up with an awkward round.
Before forcing:
Ask:
- What are we trying to accomplish?
- What weapons do we have?
- Can we fight close?
- Do we have enough utility?
- What happens next round?
Our Valorant Economy Guide covers the broader buy/save/force decision-making.
Abyss Attacker Mistakes
Entering One by One
The easiest way to lose an execute.
Ignoring Mid
You make your attack predictable.
Using All Utility Too Early
You have nothing left for the actual execute.
Chasing Kills
You give defenders unnecessary opportunities.
Planting Without a Post-Plant Plan
Getting the spike down isn't the end of the round.
Forgetting the Flank
A successful site hit can still fail if the enemy rotates behind you.
Abyss Defender Mistakes
Overextending
You die before the execute begins.
Giving Free Site Control
If attackers get everything without spending utility, the retake becomes harder.
Fighting Alone
You turn a team fight into individual duels.
Rotating Too Early
Attackers can punish predictable rotations.
Using Every Ability Immediately
You have no resources when the real attack starts.
How to Practice Abyss
Don't just play Ranked and hope you learn the map.
Use a simple process.
Step 1: Learn the Layout
Spend a few minutes walking around.
Learn:
- Sites
- Main routes
- Mid
- Defender areas
- Important connectors
- Dangerous edges
Step 2: Learn Common Angles
Look at where enemies commonly stand.
Step 3: Learn Utility
Practice your most important:
- Smokes
- Flashes
- Recon
- Mollies
- Sentinel setups
Step 4: Play Unrated or Swiftplay
Focus on the map rather than your result.
Step 5: Play Ranked
Once the layout feels familiar, start applying the knowledge.
Best Way to Learn Abyss Callouts
Don't try to memorize every callout in one session.
Start with:
A
B
Mid
A Main
B Main
Then add smaller positions as you encounter them.
When a teammate gives you a callout you don't know, pay attention to where they mean.
You'll naturally build the map vocabulary over time.
Abyss Ranked Strategy
If your goal is climbing, focus on consistency.
You don't need a five-minute highlight every round.
Instead:
- Stay alive
- Trade teammates
- Use utility
- Communicate
- Avoid unnecessary fights
- Play the objective
- Adapt to the enemy
Abyss rewards players who make fewer positional mistakes.
How Abyss Can Help You Climb
Learning the map properly gives you several advantages.
You understand:
- Where enemies can hide
- Where rotations happen
- Which angles are dangerous
- Which utility is effective
- When to rotate
- How to retake
- How to defend a site
That reduces the amount of information you need to process during a live round.
The less you're thinking:
"Where am I?"
the more you can think:
"What is the enemy doing?"
Abyss and Game Sense
Abyss is a good map for developing game sense because the layout creates many opportunities for information-based decisions.
You constantly need to ask:
- How much space do we control?
- Where are the defenders?
- What utility has been used?
- How quickly can they rotate?
- Is the spike safe?
- Should we continue or reset?
For more general decision-making, read our Valorant Game Sense Guide.
How to Adapt After Losing Several Rounds
If the enemy keeps stopping your A execute, don't repeat it five times.
Change something.
You could:
- Take Mid
- Pressure B
- Fake A
- Slow the round
- Force defensive utility
- Change your entry timing
Good teams don't simply execute harder.
They execute differently.
Abyss Attackers Should Avoid Predictability
If every round starts with:
A Main utility → A hit
the enemy will eventually adapt.
Mix your tempo.
Try:
- Fast execute
- Slow default
- Mid pressure
- Fake
- Delayed hit
- Contact play
The goal is to make the defender uncertain.
Abyss Defenders Should Avoid Predictability
The same applies to defense.
If you always:
- Push A
- Hold the same angle
- Use the same smoke
- Rotate immediately
the enemy will learn your habits.
Change your defensive patterns.
Sometimes hold.
Sometimes contest.
Sometimes give space.
Sometimes stack.
Final Abyss Checklist
Before Ranked, make sure you understand:
- A Main
- B Main
- Mid
- A Site
- B Site
- Important rotation routes
- Dangerous edges
- Common entry angles
- Common defensive positions
- Your agent's best utility
- Your team's execute plan
- Your retake plan
You don't need to know everything.
You need to know enough to stop making avoidable mistakes.
Final Thoughts
Abyss is back in the Competitive map pool for Act 5, replacing Breeze in Patch 13.04. :contentReference[oaicite:1]{index=1}
That makes now a good time to learn the map properly rather than waiting until you're forced to play it in Ranked.
The biggest lessons are simple:
Control space before committing.
Use utility with a purpose.
Trade your teammates.
Don't overextend.
Respect long sightlines.
Watch your movement around dangerous edges.
Don't make your attacks predictable.
And most importantly:
Play the map instead of fighting the map.
Once you understand the routes, angles and timing, Abyss becomes much easier to read.
If you're improving your mechanics at the same time, check our Valorant Aim Training Guide.
For better decision-making, read our Valorant Game Sense Guide.
You can also use our Valorant Economy Guide to improve your buy decisions and our How to Rank Up Fast in Valorant guide for a broader climbing strategy.
If your goal is to reach a specific Valorant rank faster, you can also explore our Valorant Boosting service.